As an Amazon Associate, I earn from qualifying purchases. In addition, I participate in several other affiliate programs that allow me to earn while I recommend products I love.
These elephant cookies are made with cut out elephant sugar cookies and royal icing, which make for a gorgeous decorated elephant cookie that is sure to impress at any event. They are particularly perfect for baby showers!
There are few animals cuter than a baby elephant, and these baby elephant cookies (or adult size elephant cookies, whatever floats your boat) are the perfect gift as baby shower cookies for new moms or to hand out at kid’s elephant birthday parties or other animal related events.
I made sure to keep the design simple, so they are easy for beginners to using royal icing to decorate cookies, but they come out looking super impressive.
In this tutorial for elephant shaped cookies, I’m going to walk you step by step through what you will need, how to make them, and how to decorate these elephant sugar cookies.

These elephant cookies are:
- super adorable
- easy to make for beginners
- delicious
- not crumbly
- perfect for baby showers or birthday parties
What You’ll Need to Make Decorated Elephant Cookies

To make elephant baby shower cookies, you’re going to need both the ingredients for the sugar cookie bases as well as the decorating tools and ingredients.
I use the same sugar cookie bases for all of my decorated cookies, so you’ll want to follow the ingredients list you can find in this sugar cookie base recipe.
You’ll also need royal icing, which is made with powdered sugar, meringue powder, water, and vanilla extract.
You can find the royal icing recipe here.
As for the tools and colors you’ll need, I recommend:
- blue food coloring – use gel food coloring instead of liquid for best results
- black food coloring
- other pastel food coloring
- black or silver “edible pearls” for the eyes – I like these ones
- piping bags – this is the best brand
- a scribe or toothpick – I love this scribe
- elephant cookie cutter – this is such a cute one
Can You Freeze Elephant Cookies?

People often wonder if you can freeze or refrigerate elephant cookies.
The answer is that you can freeze the cookies after you make them BEFORE icing for up to 3 months, and while you can refrigerate them, they hold well at room temperature in an airtight container for up to 2 weeks, and most people prefer royal icing cookies at room temperature.
How to Make Elephant Cookies

The first step in making elephant cookies is making the sugar cookie cut out dough and baking the actual base of the cookies.
Check out my sugar cookie cut-out recipe for more information on the recipe and how to get the perfect cut-outs.
I always like to let my dough chill overnight and then make the cookies the next day.
You’ll want to follow the instructions on preventing spread as well, like refrigerating the shapes before baking and baking at a high enough temperature so that the butter won’t melt first and spread.
For cut out cookies, crisp and clean edges are best!
You can find elephant cookie cutters easily online.
Flour the cookie cutter before cutting, and you should be good to go.
How to Make Royal Icing for Elephant Cookies
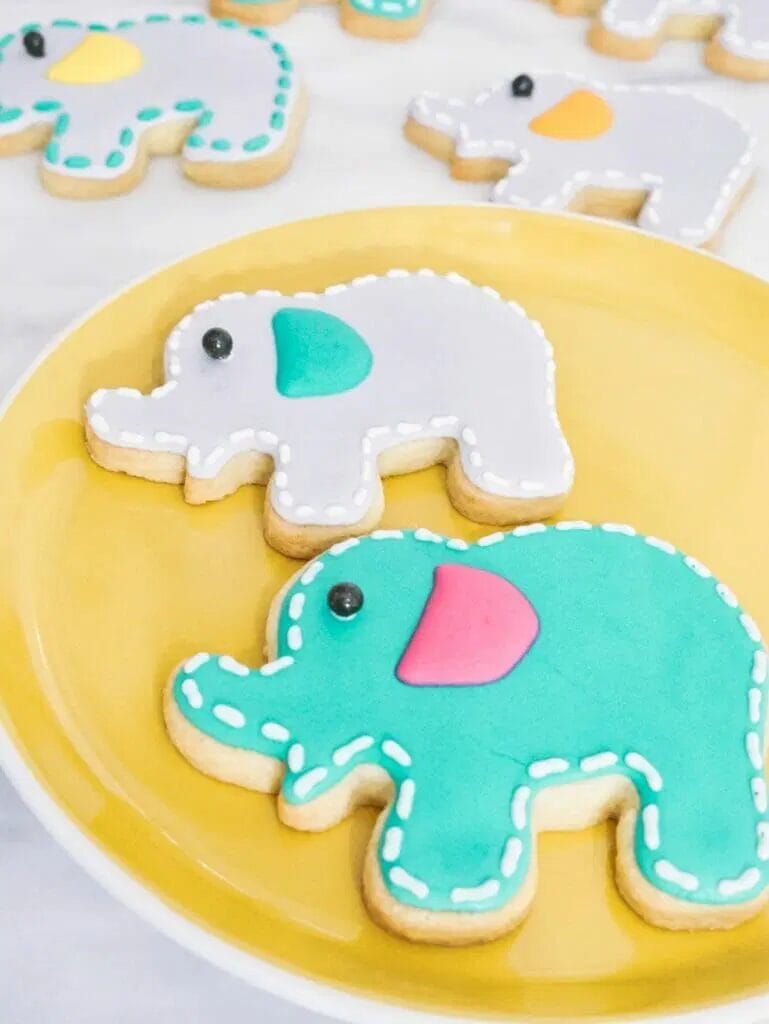
The next step is to make the royal icing to decorate the cookies with.
I’ve got a full royal icing recipe for you to check out with the basic steps, but the key thing for these cookies is that I use one consistency throughout.
There are two options when using royal icing, and that is using two separate consistencies or one consistency.
If you use two, you’ve got your stiffer, “outline” icing to outline the cookie, and then you’ve got a thinner “flood” icing which you use to fill in the inside.
With just one consistency, you do need to make sure you get it right and time it correctly using the “seconds” method, but it makes them look much more flawless and whimsical.
For these cookies, I used a “12 second” icing.
What does that mean?
Basically, if you make your royal icing according to the recipe, you’ll know you’re finished when you drag a knife through it and it takes about 12 seconds for the line in the icing to disappear.
After you’ve made your royal icing, separate it into bowls and add some coloring.
You’ll want to make a grey icing which is just a hint of black in white icing, as well as turquoise which is blue and yellow food coloring, heavier on the blue.
I also created some pastel colors like pink and orange for the ears in smaller amounts.
Put your icing into piping bags (I use tipless piping bags so you just snip a tiny bit off the end) and let’s go!
How to Decorate Elephant Sugar Cookies with Royal Icing
Now that you’ve got your icing and your sugar cookies, it’s time to get decorating!
First, draw an outline on the elephant with your icing.
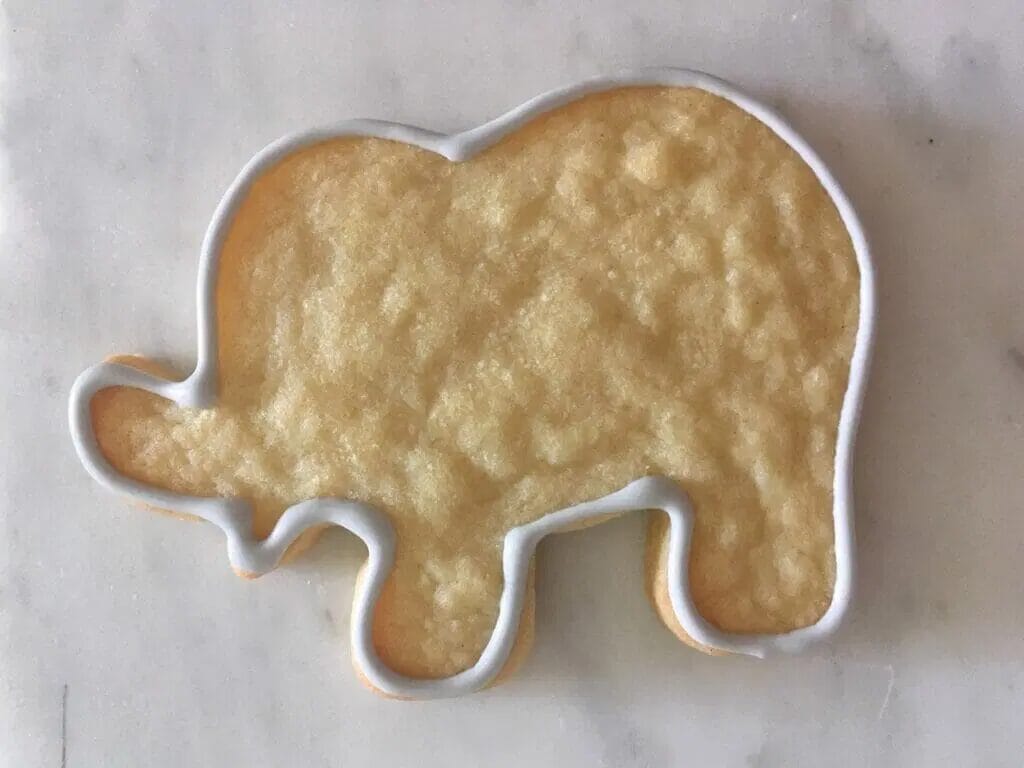
Immediately after, “flood” or fill in the rest of the cookie.
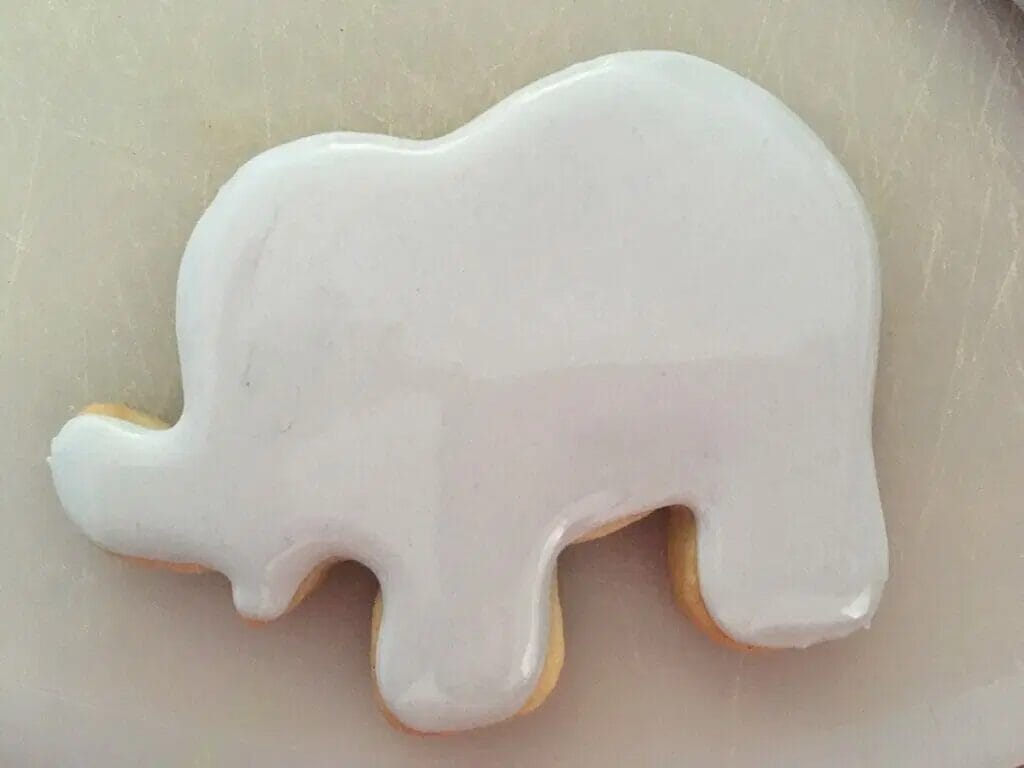
Give it a bit of a gentle shake to get the icing to settle into a smoothness.
Let this dry for at least a couple of hours, preferably 4-5 to make sure it has set enough for you to start adding detail.
When ready, pipe the outline of an ear as a half moon, and immediately fill in with the same color.
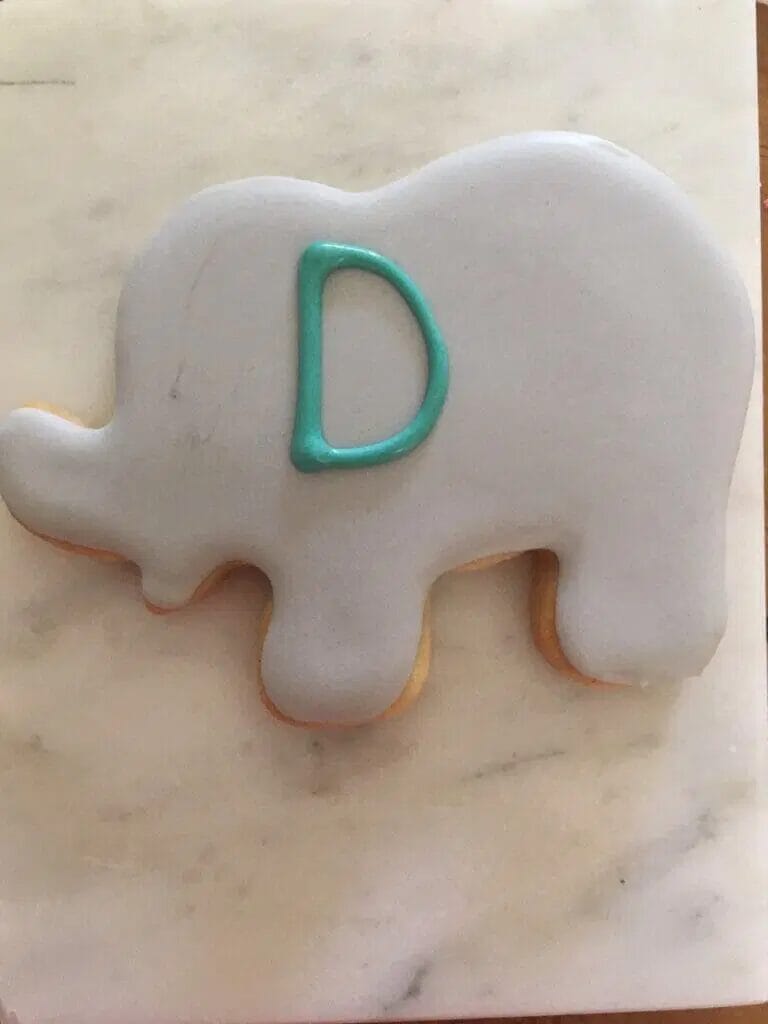
I also used white icing to create a kind of stitching pattern around the outline of the elephant.
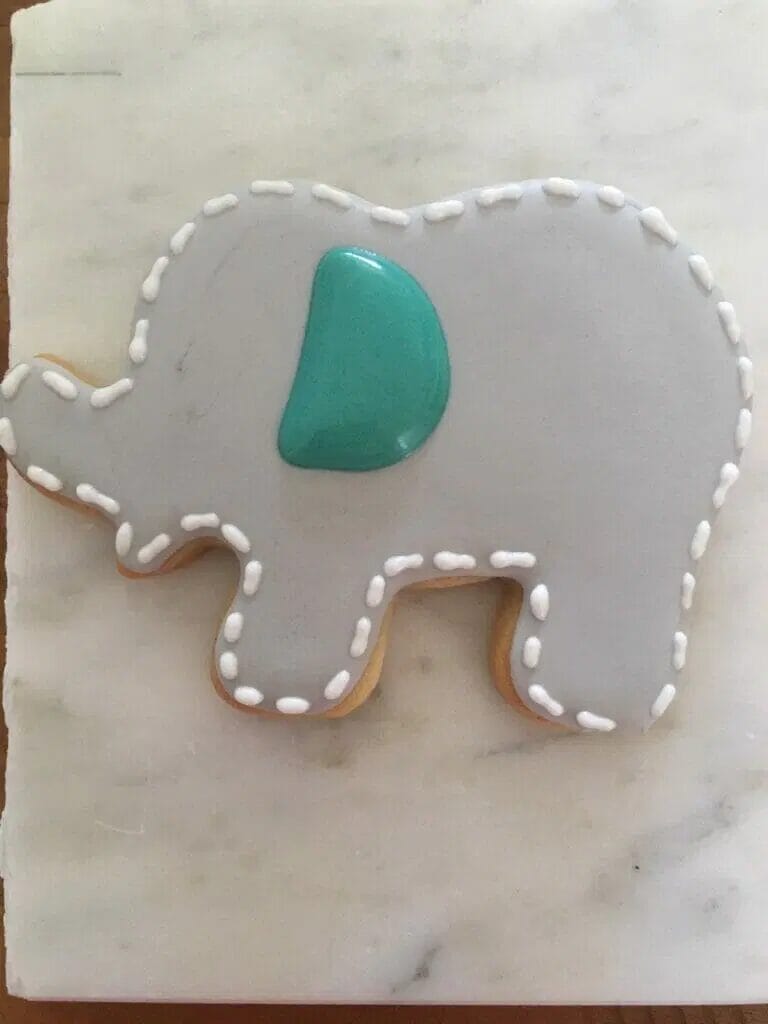
Finally, use a dot of icing to add the black pearl or sprinkle for the eye, and there you have it!

Repeat using different colors and when finished, let dry overnight before packaging if you’re gifting them or selling them.
